E36 Motor Mounts
Warning!!!
This is a write up on how I did this project. I am not a professional and not responsible for anything you do to your car.
The Procedure
Replacing the motor mounts in the e36 is straight forward and fairly simple.
You will be working both below and above to replace the motor mounts. You will need to use multiple extensions and a swivel joint to complete the process. Replacement of the 4 nuts which attach the motor mounts is highly recommended.
Ok, begin by lifting the car by whatever means you prefer.
Once the car is safely in the air, you can remove the top nuts for the mounts. I don’t have a good photo of the mounts themselves, but it should be fairly obvious as to their location.
The passenger side is much easier than the driver’s side. Removing the top nut on the driver’s side will be much easier with an assistant. Have your assistant guide the extensions/socket/swivel joint down to the motor mount nut while you guide it into position. You could remove the items blocking the way to the driver’s side mount, but it’s really not necessary to complete the task.
Once the top nuts are removed, you can then prepare the hoist. The type used in the photos here is designed to simply sit in the engine bay and assist with temporary lifting of the engine; it works great! This type of hoist is designed to use the front lifting bracket; located just above the VANOS solenoid.
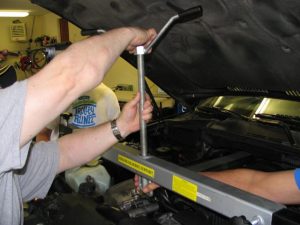
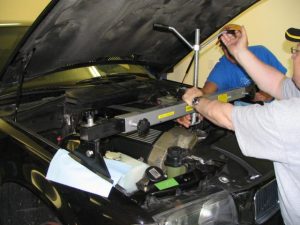
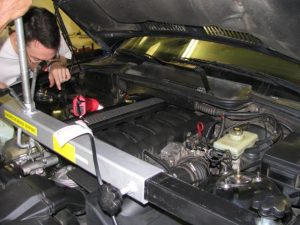
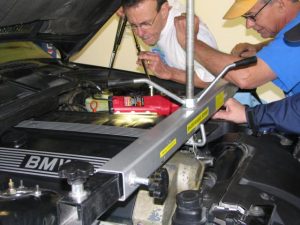
Once the bracket is attached to the hoist, begin raising the motor and check to make sure everything is working as expected. The motor should begin to lift straight up. Continue lifting the motor until the mounts are loose; however, you won’t be able to remove them just yet. You need to remove the bottom mount nuts.
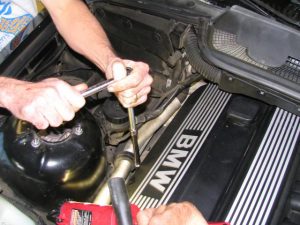
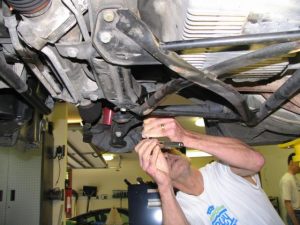
Go underneath the car and look through the control arm. You’ll see the nut that needs to be removed.
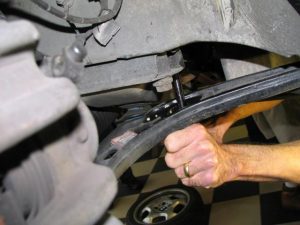
With both top/bottom nuts removed from both mounts you can then continue raising the motor to gain enough clearance to remove the mounts. Do not be surprised if you have to raise the motor a good distance to get the mounts removed. You may also find that you have to raise the motor yet further to fit the new mounts. Take note of the motor mount orientation as you remove each side, and also be sure to keep the passenger side heat shield – which is important to the longevity of the passenger side motor mount. The mounts are not side-specific, however, they are specific in their orientation. There’s a locater pin that should help with installation.
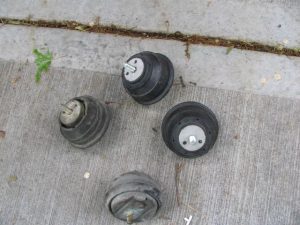
Here’s a few pictures of my old mounts once removed.

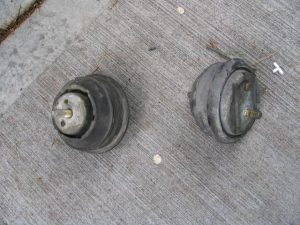
Here’s a photo comparing the old mounts to the new ones:
A few notes on installation: Be sure both mounts are orientated correctly and that you have the heat shield installed on the passenger side. Some folks prefer to install the mounts and put both top and bottom nuts on loosely. Others install both mounts and only install the bottom nuts. In other words, there’s a variety of ways to do this next step, but the big thing to make sure is that while bringing the motor back down onto the mounts everything installs without binding or going off-center. Once the motor starts to come down on the mounts, you should be able to loosely install the nuts (if not already done).
For final torque, I began by hand tightening each nut. I then moved on to using a torque wrench. When using the torque wrench, I also alternated between doing the top and then bottom nuts. When finalizing the torque on the top nuts, I was careful to make sure everything was straight and that I wasn’t cross-threading; don’t forget too that you’ll be using a swivel joint and that can make it tough to apply the final torque.